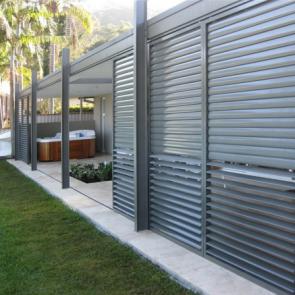
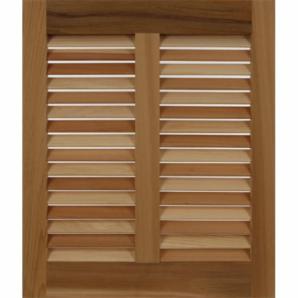
how to install louvers
Installing louvers
Installing louvers can vary depending on the type and design of the louvers you have, But today we explain a general way of installing louvers, we always recommend to follow the manufacturer’s instructions for the specific louvers you have purchased, This a step-by-step tutorial: Gathering the necessary tools and materials is the first step of the installation which is obvious, In this step you’ll need a drill, screws or other fasteners, a screwdriver, a measuring tape, a level, and a ladder or something that you can stand on, Measurement and marking the installation area is an obvious factor for installing a proper and acceptable design, Make sure where you want to install the louvers on the wall or window frame, Use a measuring tape is necessary to mark the dimensions for accurate placement.

Make the louvers ready for installation.
If your louvers need any assembly or pre-installation preparation, follow the manufacturer’s instructions to complete those steps, This may include attaching hinges, handles, or other components, Position the louvers in a correct way, Hold the louvers up to the installation area and try align them according to your measurements, You should make sure that they are straight and level, Once you correctly position the louvers you should mark the mounting holes, it is possible to use a pencil or marker to mark the locations for the mounting holes, you can use These holes will to attach the pre-positioned louvers to the wall or window frame.

next step…
Now it is time to drill the mounting holes and make the installation area ready to install the louvers,
Use an appropriate drill bit to create pilot holes at the marked locations,
The size of the drill bit should be just slightly smaller than the screws or fasteners you will be using to attach the louvers,
Be careful not to drill too deep or damage any underlying structures because this will harm the design in time and may make it loosen up.

attachment step
And now this is the attachment step.
position the louvers back in place and align them with the holes with the pilot holes drilled,
Secure the louvers to the wall or window frame using the appropriate screws or fasteners,
Make sure you attach them firmly to the installation area but avoid overtightening,
as it may damage the louvers or the mounting surface and this may ruin the great design or durability.

installation process
Checking is one of the last steps in the installation process, After attaching the louvers, test their functionality,
Open and close them to ensure they operate smoothly and as they are actually intended to,
Make any necessary adjustments if the louvers are not functioning correctly, In the last step you don’t have to do that much,
Once the louvers are securely installed and operating properly,
check for any visible gaps or misalignments,
Make any necessary adjustments or use caulking or weatherstripping to seal any gaps to improve insulation and prevent drafts,
This was mostly everything you should now about installing a louver system from zero to 100,
It is highly recommended to use the manufacturer’s instruction when you want to do it properly and for the best result.

our offers
Types and examples of curtain wall construction and execution Building Facade|facade engineering|facade materials Ceramics Facades|Handrails|Terracotta Facade|Thermowood WPC Wood Plastic|facades glass|dryfacade (Aluminum Louvers)
Detailed technical and executive information for those interested Also, Here are some of the capabilities of this company:
aluminum company producer factory in Manufacture aluminum
such as profile windows & door aluminum
Details of the Valid Aluminium Company of factory products
Curtain Walls|Frameless glass facade|Aluminum louver
Skylight glass|Dry ceramic|Dry stone|aluminum profile
